Prototyping is a critical stage in the design process for nearly every project. When developing a product, product developers need to get proof of concept and check the fitment as soon as possible. In decades passed, making a plastic prototype consisted of making a prototype mold to finalize a design before investing in production tooling. However, the industry was forever changed by the speed and simplicity of 3D printing. 3D printing is undoubtedly a powerful tool for engineers and designers, however, that doesn’t mean there’s no longer a need for prototype mold building.
The Stages of a Plastic Prototype
Design Phase
- Define the project requirements, including the purpose, functionality, and target audience of the plastic part.
- Brainstorm and sketch initial concepts to explore different design ideas and functionalities.
- Conduct initial studies and design reviews to identify potential issues and refine the concept.
- Be sure to create a design built for injection molding.
Virtual Prototyping and Simulation
- Utilize CAD software to perform virtual prototyping and simulate the behavior of the plastic part under various conditions.
- Conduct finite element analysis (FEA) and other tests to assess structural integrity, thermal performance, and fluid dynamics.
- Iterate on the design based on simulation results to optimize performance and address any identified weaknesses or concerns.
Prototyping Phase
- Select the most suitable functional prototyping method based on project requirements, budget, and timeline.
- Produce a physical plastic prototype of the part using 3D printing, CNC machining, injection molding, or vacuum forming. We’ll discuss this in greater detail below.
- Evaluate the prototype for form, fit, and function, testing its performance against the intended specifications.
- Gather feedback from stakeholders, including designers, engineers, and end-users, and incorporate necessary revisions into the design.
Testing & Validation
- Conduct comprehensive testing and validation of the plastic part to assess its performance and durability under real-world conditions.
- Perform functional testing to ensure that the part operates as intended and meets all functional requirements.
- Conduct environmental testing to evaluate the part’s resistance to factors such as temperature extremes, humidity, and exposure to chemicals.
Design Optimization
- Refine the design based on feedback from testing and validation phase.
- Optimize the design for manufacturability, considering factors such as tooling requirements, material selection, and cost-effectiveness.
- Seek opportunities to streamline the manufacturing process and minimize production lead times while maintaining product quality.
Production Preparation
- Finalize the design of the plastic part, including all necessary changes and improvements identified during prototyping and testing.
- Prepare detailed manufacturing specifications, including material specifications, dimensional tolerances, surface finishes, and assembly instructions.
- Develop the tooling and production processes necessary for mass production of the plastic part. Ensure that you meet all manufacturing requirements.
- Conduct final design reviews and approvals before transitioning to full-scale production.
Time to Produce Your Prototype
When you reach the prototyping stage, you’ll need to choose which manufacturing methods you will use to produce your prototype. With a variety of options available you should choose the one that will best fit your cost, time, and production constraints. Let’s take a look at the various options you should consider.
3d Printing
If you have a part designed and ready for prototyping, there is almost no reason not to 3D print it for initial testing. Over time, the accuracy of 3D printing has improved significantly, while the cost of the machines has decreased considerably. This may sound like the end for prototype injection molds, but it’s missing some important points.
- A 3D printed part is unlikely to perform exactly like an injection molded part. Because of the nature of 3D printing, it does not create the same polymer flow as plastic injection molding. Meaning you can not test material properties like strength and flexibility.
- If your product requires a specific material, it may not be available for 3D printing. Though there is an ever-increasing range of materials available for 3D printing.
- Prototyping using an injection mold simulates the shrink and warp in a production injection molding environment. This is important for molded parts with critical dimensions. A prototype allows for easy adjustments to dimensions that can be replicated on a production mold.
Check out this article on injection molding and 3D printing for more information on the differences.
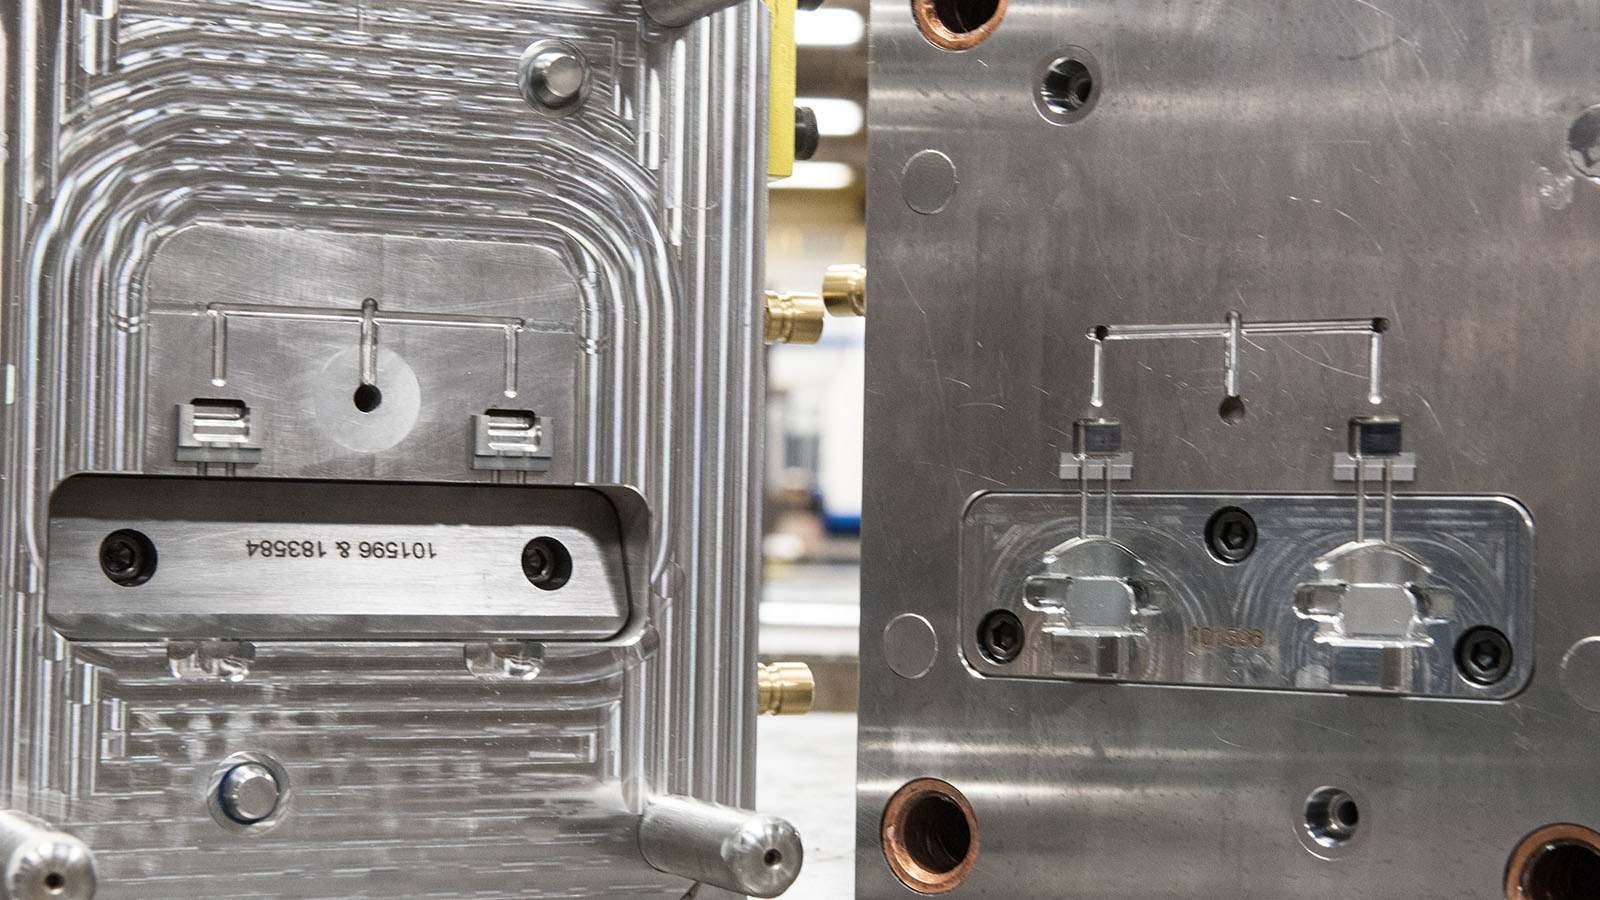
Prototype Molds
Due to standardization and specialization, the costs and lead times of prototype injection molds have decreased over time. Injection mold builders often standardize molds so that most of the work and machine time required is complete before a part form is machined in. The standardization of mold bases and mold frames also makes them reusable from project to project, which prevents the direct cost common components from being passed on to the end user.
Many mold builders now specialize only in prototype injection molds, allowing them to streamline lead times. From the quoting process through design and construction, every detail of the project is optimized for efficiency.
Production-Ready Prototype Molds
In projects with tight deadlines, it can be cost-effective to create prototype tooling that can also fulfill initial order quantities. These prototype molds are built to higher standards and have a longer lifespan compared to quick-turnaround prototype molds. While these molds are built to keep the cost of changes low, they often have fewer cavities than the final production mold.
Another option is to build a prototype mold with only one cavity. For example, if the production mold has sixteen cavities, meaning it makes sixteen parts in each molding cycle. By creating a prototype with one cavity, you can make changes to that part without needing to adjust all cavities. Once the plastic prototype part is approved, the remaining cavities can be completed accordingly.
Mold Inserts Only
Injection molds intended for high volume production typically consist of a mold frame and tooling. The mold frame is a series of plates, pins, bushings, and supports that holds the tooling and provides a connection point to the molding machine. The tooling is what has the part form and what comes into contact with plastic to make the part.
At Basilius, we’ve developed a proprietary mold base that can accept tooling from various projects. In this case, the end-user only has to pay for tooling instead of the entire mold. Because of this, the mold is less expensive, and the lead time is shorter. Check out our other post for more information on mold inserts only (MIO) options at Basilius.
Taking The Next Steps
In the world of product design, prototyping plastic parts is a crucial first step. It allows you to try out ideas, fix problems, and make sure everything works before mass production begins. Over time, new technologies like 3D printing have made plastic prototyping faster and more flexible. However, traditional methods like making prototype molds are still important, especially for parts that need to be just right.
Understanding the stages of plastic prototyping is key. From brainstorming ideas to testing and refining designs, we’re here for you. If you need assistance with a project simply contact us and an expert from our team will be happy to help.